Wednesday, September 22, 2010

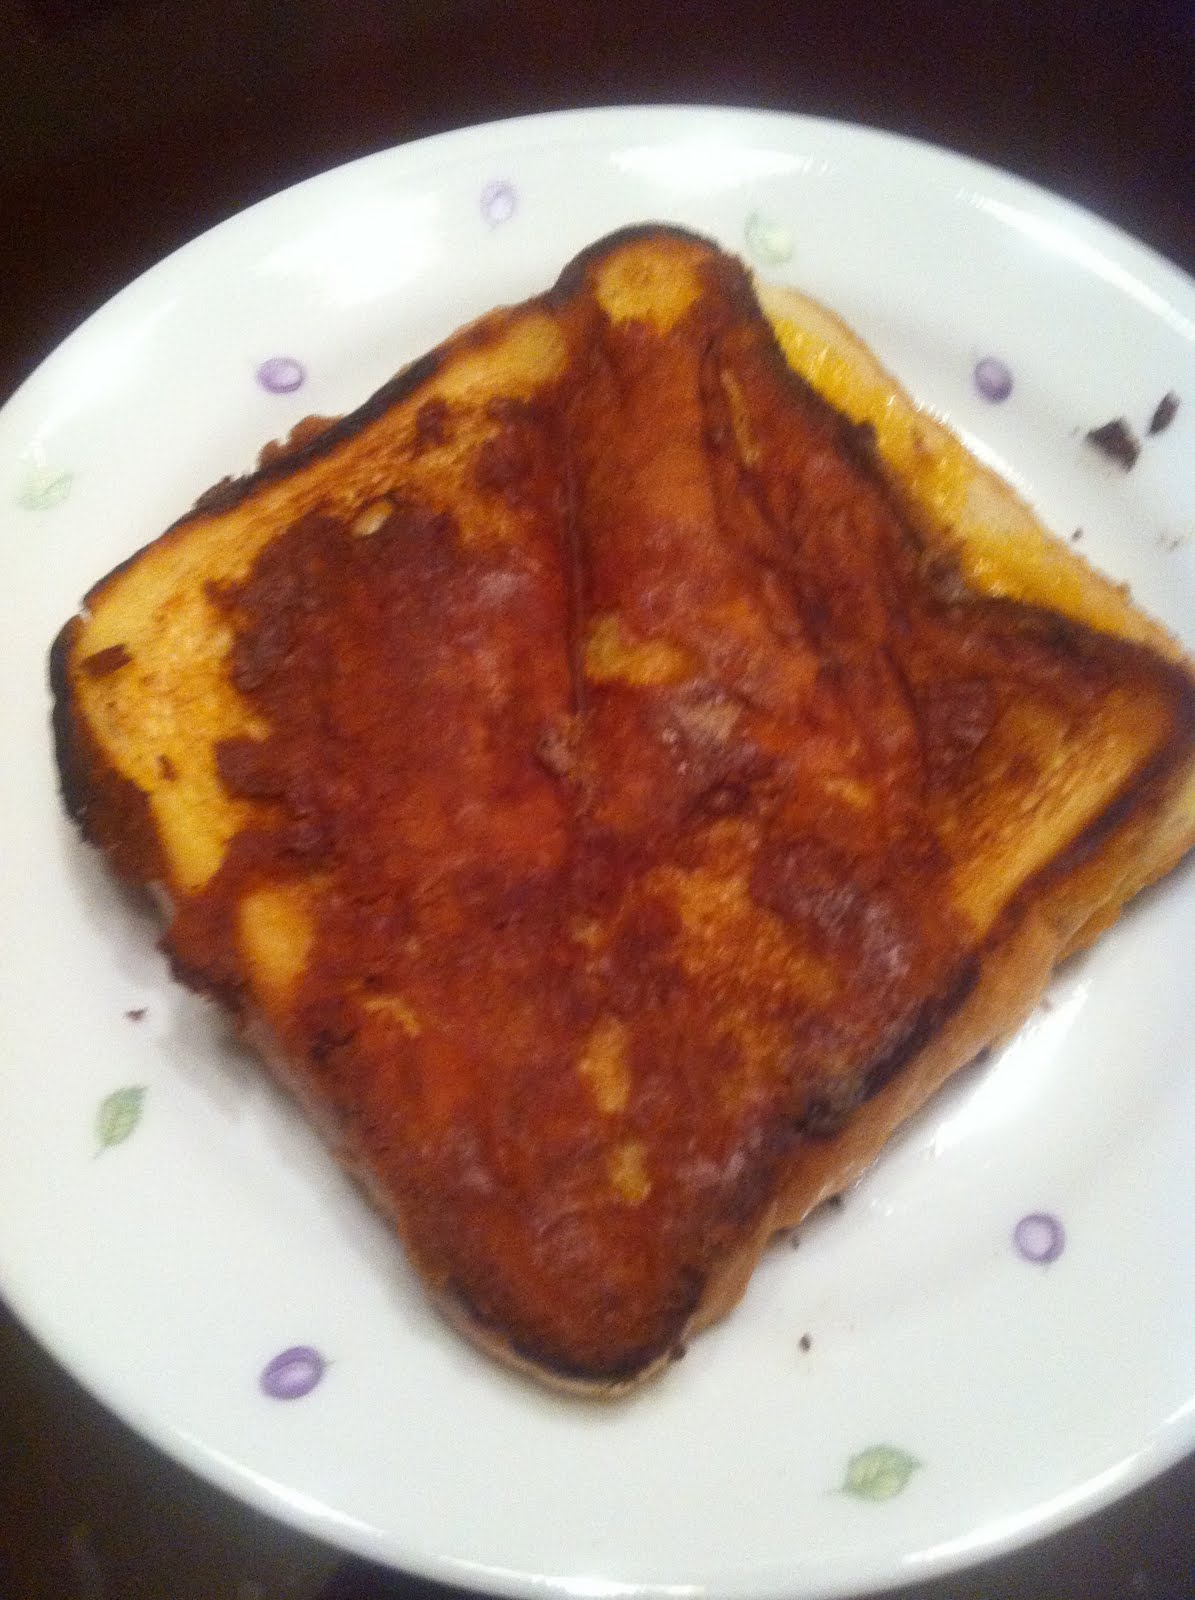
crispy and cheesy cheese bread!!!

So...here we go...as I promise...the crispy and cheesy sandwich.

I remember in the days of PID, we always stay back in school till like 10 or 11 at night, playing game and doing work at the same time. And often we would had nothing to eat for dinner (canteen close at 6+) so some would eat early, others would just starve till supper later. And once in awhile some hungry soul will suggest going to business school cheers or the sandwich machine to grab some food. haha...awww memories...ok that aside, the point I wanna say is that the mushroom and cheese sandwich from the sandwich machine, its quite nice actually, has a crispy outside and soft and cheesy inside (but its most probably microwaved which is cancerous). So this is like a even nicer version I saw on the net, even crispier then the ones in the sandwich machine. And also, this is so much cheaper :D

So here are the ingredients:
Really simple, 2 silces of bread, some shredded cheddar cheese, and some butter.
The amount of cheese can be controlled as you like, and sliced cheese is said to work too, im not sure, since im using those left over ones from my mac and cheese. Im using my leftover cheese, these red cheddar are quite salty, so if you find it too salty, switch to mild cheddar instead (the whiter ones).


Step 1: Heat up the pan and put in the butter :D its better to use a non stick pan btw.


Step 2: Put in the bread


Step 3: Put in about 60% of your cheese in 1 side of the bread


Step 3: flip up the other bread, and it will look like this


Step 4: Ok now, spread some cheese on top of the bread, yes we are cheesing the outside too :DDD and 2 things to note.

1. make sure the bread is hot enough so the cheese will melt alittle like 5 % melt (not too much, cos we cant stay in this stage for too long)
2. Do put in a little bit more butter before flipping the whole bread with cheese over. If not it might stick to the pan. We want the crispy crust on the bread, not on the pan :)


Step 5: After we toss over the bread cook it with medium low heat till its crispy, this I use feel to gauge haha, cos the timing is very important, if too slow it will burn, too fast it will not be crispy and there will be cheese on pan.


And just before we are about to flip, add cheese to this side too, and let it melt a little, like 5% melt enough already then do the flipping over. Do the same and cook it till it becomes crispy.


And Tada....we have out inside outside crispy cheesy sandwich

Look at the crispiness and the cheese flowing out :D

Ok and lastly, some variation, what Im doing is just a fully cheese 1, if you wan, can add in some meat or mushrooms, it taste good too.

This makes a good breakfast or supper :D

Enjoy :D

Tuesday, September 21, 2010

"Get Over You" - G.E.M. 鄧紫棋


Gem's latest new song!!! omg...new album coming soon, cool~~ really respect this 19 year old song writer and singer, her voice is strong and matured and her songs are so good. Yea its cantopop haha, im a cantopop fan, although I dont understand cantonese. I find that when I listen to emotional songs that i dont understand the lyrics, I can enjoy the emotion without feeling sad.

I think she is dam cool, go search up youtube for her songs here, she did some chinese songs too,
http://www.youtube.com/user/GEMblog

And oh my cheese bread tutorial!!! don't worry i have not forgotten :D it will be up by tomorrow night :D I rotted my off-day afternoon reading book, i love to spent some peaceful time alone. but i shall think abt some more tutorials soon.

I shall work hard to keep this blog alive, and i decided to change it into some life and some food blog, cos i realize if its purely on food, its gonna be dead in a matter of months :D

Cheers

Monday, September 20, 2010

Durian Mooncakes!!!

Today, i decided to buy some mooncakes for my family, as im now working and have abit of money, im going to be a filial son and buy some mooncakes, and this caught my eye.

four season durian's fully durian filling mooncakes with durian snowskin. I cannot describe how much i love to eat durian, and so does my family, so decided to buy it :D

Tada open the box and inside is 8 small snowskin durian mooncakes, lovelyI tried 1...and then...im addicted...OMG IM ADDICTED AND I EAT 3 PIECES ON THE DAY I BOUGHT IT!! LOL and i feel like eating it now....dam...nooooooooooo i need to cut down on fattening and heaty durians!!! haha
Omg look at the full durian filling inside!!!! SEXY!!!!

ok...now...im gonna sum up this...

Its delicious, really made of real durians inside and nothing else. And with a reasonable price of $39 quite cheap compare to standard mooncakes of 40+ 50+, they also have a 4 big piece version ones, but i choose this because i think it can control my eatings...if not now out of the 4 big piece, i will only have 1 left in my fridge haha. Highly recommended!!! and its available at many place that sells mooncake, those shopping malls that have mooncakes fairs, like at taka or some smaller shopping malls also have.

ok im off, really tired, been blogging for 2 hrs + plus the mac and cheese tutorial (took my 2 hrs), i feel like im typing some report like im doing in school...shiok...i think got more then 1k words, someone help me proof read? haha jk...i dun care...about my english....as long as the content is there...and people understand...its good

Enjoy!!!

Mac and cheese

Alright!!! yay mac and cheese!!!! A family classic and a all time favorite. I love cheese, I love eating them and also cooking with them.

First let me start off with some introduction on cheese. As we all know there are many different types of cheese, Parmesan, Cheddar, Swiss, Mozzarella and many many more. Each and every one taste differently although all of them are cheese and their texture are also different. In terms of softness we have the Mozzarella which is real soft normally we use it for pizza, and on the other end we have the hard cheese like Parmesan. But today I will be using cheddar, its 1 of the most common cheese, easily available and also a standard cheese for many mac and cheese. In cheddar there are also a different range of it, there are mild and strong ones, mild ones are usually white and strong ones are call red cheddar, they are not exactly red, more orange actually :D and thats what we are using today, Red Cheddar :)). In terms of nutrition, cheese provides a great deal of calcium, protein and phosphorous, some studies said it could even prevent tooth decay :D haha.

Ok Im gonna keep this lengthy facts aside and introduce out ingredients of the day.
We have red cheddar :DDD Im using the shredded ones, you can buy a block of it if you want and shred it yourself, self shredded ones have nicer texture, but its more expensive, (you can also mixed in Parmesan if you want, it taste great, but is quite expensive, 1 piece cost like 15 bucks =.= im going for the budget mac and cheese here, I havent get my pay yet :(( ).

Elbow macaroni, yes the standard 1 for mac and cheese :D

And the secret ingredient from the previous post, the pinkish thing in the mac and cheese, its bacon. Alright, if you guys dont like the fatty bacon can opt of hotdog or ham some extra taste or not put in any of those also can. The reason behind this bacon theory is so that if gives the cheesy mac and cheese a taste of crispiness in it, it gives a contrast in the taste and texture of the mac and cheese, so does the next ingredient im going to introduce, the breadcrumb. When these 2 crispy and crunchy ingredient mixed into the soft cheesy mac and cheese, it gives off a nice taste, trust me :D

Next is Breadcrumb!!! Im sure if you guys see youtube or those online recipe, they emphasize a lot on breadcrumb too, at first I though its just some deco, until I get the contrast in the soft and crispy mac and cheese, the next mac and cheese I make, I put double the bread crumb, its amazing, really. One of the recommended brand is Panko Japanese Breadcrumb, or any Japanese breadcrumb, but i couldnt find any of them in cold storage, so i get this, the only 1 avaliable there, haha.

Next, milk and cream mixture, or full cream milk also can LOL serious, I tried it cos I cant find cream, then I used cream and milk, almost the same :D
Ingredients (1 person serving):
1 cup of elbow macaroni (i use the tiny elbow mac, if its the bigger ones i think this protion needs to be more, im not sure T_T)
1/2 cup of milk and cream mixture (1:1) or full cream milk
3/4 cup of cheese
1/2 cup of bread crumb
2-4 pieces of bacon, cut into small pieces (this depends on how much u like bacon, i use 4 for mine, really nice!!! standard is 2 actually)

Step 1: Cook the macaroni, make sure its al dente - an italian term for not fully 100% cook, so that by the time it is served to the person who eats it, its just right 100% cook, not easy to master, but just try haha, because we are gonna do some mixing and baking after this, so don't wait till its floating up, its gonna be overcook and too soft in the end, which will cause the taste to be not that nice.

Step 2: Remove the water :D
Step 3: Put in the milk and the about 80% of your cheese, leave some for later, and stir. 1 way to see if its too much milk of too less is to see that when you pour the milk in, the milk level should not be above the macaroni, this pic below shows too much milk, i acutally have another 1, that shows the right amount, but its too blurr :( so yea, make sure the milk level is slightly below the macaroni level
There are 2 ways to stir, 1 is to do it without heat, if you are fast enough and with the heat from the just boiled macaroni, it can be done without using the stove, another way is to do it on low heat, both way works, but the safer way is to do it on low heat if you don't want those extra cheese to be stuck in your spoon haha. And after its done, it should turn out something like the picture below, creamy and cheesy mac and cheese. And also at this stage, if its too dry, add more milk, if its too watery, add more cheese, try to put the milk in little by little, it helps in better control too.

Step 5: Put in the bacon, 1/4 of the breadcrumb and a little bit of salt and stir again. At this stage if you want to add other spices like cayenne or black pepper, or white pepper its ok, add abit of them if you want more flavour, but I prefer mine to be plain as I want to taste the cheese and bacon, so I only add in salt.
Step 6: Put the mixture into a baking dish, as i couldnt find mine, i dont know where my mom hide them, so I use this metal plate instead lol. BTW at this stage, its can be eaten already, so taste it, next we are going to do the top, the crust.
Step 7: Put the remaining 20% of the cheese on top, you can also put in 2 or 3 slices of tomato, its optional, just for some deco and add in some nice sour taste in it later. It looks better with the tomato actually.
Step 8: Get the rest of the breadcrumbs, add in a teaspoon of melted butter, and stir
Step 9: Then coat the top with this breadcrumb and butter mixture, remember to put ALOT ALOT because its really really nice with them on haha!!
Oh Ive like 2% of the cheese left over, so I just throw them on top, give it a baked cheese finishing.
Step 10: Set your over to grill, and grill the top, now we only want to cook the top and make it crispy. If using a baking oven or microwave, just heat it and make take out when the top get crispy.
Tada, this is the crispy crust macaroni and cheese and bacon haha
Alternatively, you can use a pizza style top, this is the mozzarella cheese topping version, cheesy right? hahahah but the breadcrumb 1 taste nicer, if you want can try both together :DDD
Enjoy, and pardon me for the bad photos and bad English, my English is all the while bad...so sad...and the photos, this time round its abit not nice, cos im using my new phone's cam, not really use to it yet, :P

------------------------------------------------------------------------------------------------------------

Wa dam tired now haha....anyway today I reach home, open my computer and while planning to post my next post, you will see later, i saw a friend's blog about some stuff that makes me real sad...i remember im always in that situation before, not once, not twice, countless times until i cant even remember, theres a saying, "its not easy to be a nice person", being nice is really not easy, because sometimes the things that come back to you are shit, but i always believe, that there is karma, good karma, if you do a good deed today, one day, i dont know when, but 1 day, you will get back what you deserve, maybe from another source or what, but it will somehow comeback to you. Theres also a saying... "a nice person is more beautiful then a pretty person" :D

Ok now this is making me emo...shit...no... anyway...COMING UP NEXT!!!
my last night supper!!!! hahaha
Look at the cheese flowing out, and the crispiness of the bread :D coming soon...:D:D:D:D

Saturday, September 18, 2010

Sneak Preview...

HoHoHo... for those people who knows me well...you know I love cheese....cheese prata, cheese bread, cheese sausage many many more.

So today I shall show you all my new learn (yes...im a noob i just learn only) recipe, Mac and cheese. Im not good at this yet, so I don't dare to do a tutorial. But since I love cheese, so I decided to try something cheesy out, its easy and nice, let me familiarize with this and i shall do a tutorial :D


Guess what is the brownish thing on top and the pinkish thing inside it :D

coming soon

Thursday, September 16, 2010

Homemade Lemon Iced Tea

So, ive been working on this for the past 2 days...lols...its quite fun to mixed drink :D
Lemon iced tea, yes, its lemon not long island lols

A simple and nice drink for everyone, and homemade drink
s always have its own authentic and unique taste compare to those powered or packet drinks. Well this drink seems easy, but requires some experiment to make a good taste, different amount in each ingredient will cause a change in taste. So firstly i conducted some experiment to get the taste i wanted.


different cups of experiment lols...

-

Ok now lets start...first the things we need:
Lipton yellow label tea, I use afew other tea to see if i can get a better taste, but lipton tea is still the best in all the tea i experiment hahah, I even get TWG English breakfast tea which I loved the smell and taste, its a good tea, but once the lemon goes in, the taste is not as good as Lipton. If i wanted to do a Iced tea, TWG would be best haha. But now is Lemon Iced Tea, so i shall stick with the traditional Lipton.

Sugar, yes we need sugar...and I prefer raw sugar, those brownish ones, they taste better and with a smell of sugar cane.


And...i use sugar cubes instead...cos i wanna drink tea with it, but in terms of measurment, those fine sugar would be easier, so get fine raw sugar.


Lemon!!!! sliced


Measuring cup, if you wanna use feel and tasting to argar the sweetness and sourness also can, which is what I perfer and did when im doing my expirement, with that I can alter the taste i want.
But now since im doing a tutorial, I think I should have a standardized amount of sugar and lemon and tea, yea...no more argaration. :( so these measuring cups are important, i specially bought it for this tutorial!!! haha and of cos for future drink mixing :D

Step 1, put the tea bag into a jug, the ratio of tea bag to water is 1 tea bag : 250ml of water so I have 3 tea bags here...

And do my maths...3 tea bag : 750ml, so add in 750 ml of water, abit less also can, but not over, because if too much water the tea will be diluted.
Step 2, cook the tea, cook the tea for 4 to 4.5 mins, make sure the timing never exceed 5 min, because cooking too long will cause the tea to be too bitter.


Step 3, leave the tea to cool for about an hr, then put it into the fridge for 2 to 3 hrs, actually you wan 2 to 3 days also can lols.


Step 4, next we are making the sugar syrup, you can actually add the sugar while the tea is cooking, that is what i will do, but i decide to make it this way so that the sweetness of the tea can be alter later to suit different people's taste. So 1st we have about 10 sugar cubes, which is about 10 teaspoon of sugar. yes this is about 1 to 2 serving, if you wan more for the whole 750ml of tea, get roughly like 25 to 30 tea spoon of sugar :D YES THATS ALOT OF SUGAR LOL but we can always opt for a lower sugar choice later :D


Add in hot water to the level of the sugar, roughly 1:1 and stir. Stir till the sugar melt. Dont worry if there are some sugar below, its ok as long as its not too much, cos we are not cooking in a pan with heat.

Step 5, now its time to combine the sugar and the tea and the lemon!!!
Ok so here is the formula, ratio of tea : sugar, 5:1 so every 250ml of tea we put in about 50ml of sugar, in my case i did 60 cos the measuring cup min scale is 60. After that, 2 slices of lemon is enough, some people might prefer 1 but I think 2 is just nice for a rich taste. And yes no juices is needed, yes i tried those with juice ones, but i found that this method taste nicer, the lemon skin aroma is there plus the lemon juice from the sliced lemon is just right.

Of cos, we can alter the taste, so if you want it to be sour, go and poke the lemon with straw or add 3 to 5 drops of lemon juice to 1 glass of tea. And also if not sweet enough, add more sugar syrup.

Tada, enjoy!! haha, hope you guys will like it, 100% home made, no powder tea or packed tea used :DDDD

*edit* haha I miss out this

Summary, ingredients needed:
3 bags of lipton tea yellow label (for 4 servings)
750ml of water
Ice
sugar
1 lemon

- Iced tea Ice cubes -

We often face the problem of ice melting in drinks and thus making the drinks dilute, so heres a quick solution to it. By making a simple ice cube made of iced tea, we can prevent the drinks from getting diluted. So this is simple, just put the tea into ice cube maker and freeze it :D

The End

On a side note, i feel in love with the TWG tea smell and taste, its really nice, im trying to transform it into special lemon iced tea with some method...still experimenting on it :D